
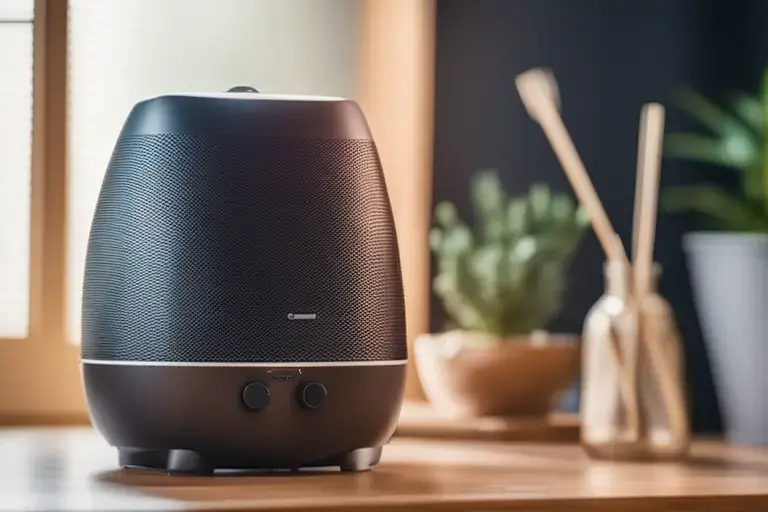
Are you tired of constantly getting sick or experiencing dry, irritated skin during the colder months? A Vicks humidifier may just be the solution to your problems. These handy devices add moisture to the air, helping to alleviate symptoms of dryness and congestion. However, like any appliance, it’s important to regularly clean your Vicks humidifier to ensure it continues to function properly and provide you with the best results.
But don’t worry, the cleaning process doesn’t have to be a daunting task. In this step-by-step guide, we will walk you through the simple and effective way to clean your Vicks humidifier, so you can continue to enjoy its benefits without any hassle. Let’s get started!
Importance of Regular Cleaning

Regular cleaning of your Vicks humidifier is not only essential for its optimal operation, but it also plays a significant role in maintaining a healthy environment in your home. Over time, bacteria, mold, and mineral deposits can accumulate within the device. If left unattended, these can not only interfere with the efficiency of your humidifier, but they can also be dispersed into the air you breathe, posing potential health risks such as respiratory issues and allergies.
Beyond health implications, regular cleaning helps prolong the life of your humidifier, ensuring you get the most out of your investment. It’s recommended to clean your Vicks humidifier at least once a week or more often depending on use and water hardness. With regular maintenance, you can keep your humidifier running smoothly, providing you and your family with a comfortable and healthy living environment all year round.
Gathering Necessary Cleaning Supplies
Before you get started with cleaning your Vicks humidifier, you’ll want to make sure you have the necessary supplies on hand. Not to worry, these items are simple and easy to find. For a thorough clean, you’ll need white vinegar, a soft cloth or sponge, and clean water. The vinegar serves as a natural disinfectant and descaler, perfect for breaking down any mineral deposits or bacteria.
A soft cloth or sponge is ideal for gently wiping down surfaces without scratching them. It’s also important to have a large bowl or sink available for soaking parts of the humidifier. If your humidifier has a filter, refer to the manufacturer’s instructions as you may need to replace it or clean it with a specific product.
Finally, always wear gloves while cleaning to protect your skin from contact with vinegar and any potential mold or bacteria in the humidifier. Now that you’re armed with all your cleaning essentials, you’re ready to start the disassembly process!
Disassembling Your Vicks Humidifier

Let’s begin by disassembling your Vicks humidifier. First, make sure the device is unplugged before you start. This not only ensures your safety, but also protects your device from any possible electrical damages. Now, start by removing the water tank from the base of the humidifier. It’s best to empty out any remaining water over a sink or drain.
Next, if your humidifier has a removable tray, pull it out gently. If there’s a mist chamber, remove that as well. Don’t forget to check if your device has a filter. If it does, carefully take it out and set it aside. We’ll address cleaning it in the next steps.
Remember, each humidifier model is different, so be sure to refer to your user manual if you’re unsure about any part. With your Vicks humidifier disassembled, you’re now ready to move onto the deep cleaning phase. So, roll up your sleeves, it’s time to get down to the nitty-gritty!
Cleaning the Water Tank
Starting with the water tank, pour a generous amount of white vinegar into it, aiming to fill it about a third of the way. This will help to naturally break down any grime, mold, or mineral deposits. Then, simply give it a good swirl, making sure the vinegar reaches every nook and cranny. Once you’ve done this, allow it to sit for at least 30 minutes.
This will give the vinegar sufficient time to disinfect and dissolve any unwanted elements. After letting it sit, you can begin scrubbing the inside of the tank gently with your soft cloth or sponge. If there are stubborn areas, let them soak a bit longer, or use a soft-bristled brush to reach them.
Once you’re satisfied, rinse the tank thoroughly with clean water until all the vinegar smell is gone. Remember, it’s important to ensure the tank is thoroughly dry before reassembly to prevent mold growth. Simply place it upside down on a clean towel and allow it to air-dry completely. Patience is key!
Disinfecting the Water Tray
Moving on to the water tray, you’ll again make good use of your trusty white vinegar. Fill the tray with vinegar and let it sit for about 30 minutes, giving it time to work its disinfecting magic on any bacteria or mineral deposits that have made themselves at home. Using your soft cloth or sponge, gently scrub the tray, paying special attention to any stubborn spots.
Remember, vinegar is a natural descaler and disinfectant, making it your ally in this cleaning mission. For hard-to-reach areas, a toothbrush can come in handy. Once you’re satisfied with the cleanliness, rinse the tray thoroughly with clean water, ensuring no vinegar residue is left behind. Like the water tank, let it air-dry completely before reassembling. You’re now one step closer to a thoroughly clean humidifier. Next up, the wicking filter!
Caring for the Wicking Filter
If your Vicks humidifier has a wicking filter, it’s crucial to give it some TLC during your cleaning routine. This filter is responsible for helping the water evaporate and create the mist that humidifies your room. Start by checking your user manual to see if the filter is reusable or needs to be replaced.
If it’s reusable, rinse it under cold water to remove any impurities, but avoid using any cleaning products as they can damage the filter. Squeeze gently to remove excess water, but do not wring it out. If your filter is discolored or has a persistent odor, it’s time to replace it.
Remember, a well-maintained filter ensures optimal performance and contributes to a healthier environment. So, whether you’re rinsing or replacing, proper filter care is a key step in your humidifier cleaning journey. Now, with a spotless filter in hand, you’re ready to proceed to the final steps of reassembly and testing.
Reassembling and Testing Your Humidifier
After your humidifier parts are completely dry, it’s time to put everything back together. Start by placing the wicking filter back in its rightful spot. If your model has a mist chamber, gently snap it back into place. Follow this with the water tray, aligning it carefully to ensure it fits properly. The last part to reassemble is the water tank.
Once all the components are back in place, fill the water tank with clean water and plug the humidifier back in. Now comes the exciting part – testing! Turn on your humidifier and keep a close eye on it for a few minutes. You should see a fine mist coming out, and it should operate quietly.
If all is running smoothly, congratulations, you’ve successfully cleaned and reassembled your Vicks humidifier! But remember, this isn’t a one-time job. Make a note on your calendar for the next cleaning session to keep your humidifier performing optimally. Now, sit back, relax, and breathe in the fresh, moisturized air you’ve worked so hard to achieve.
Tips for Keeping Your Humidifier Clean
Maintaining a clean Vicks humidifier doesn’t end after a thorough cleaning session. It’s about creating habits that ensure its long-term effectiveness and hygiene. Here are a few tips to help.
- Always use distilled or demineralized water to fill your humidifier. This type of water has lower mineral content, thus reducing the buildup of mineral deposits in your unit.
- Make it a habit to empty and refill the water tank daily. Stagnant water can become a breeding ground for bacteria and mold, which are then released into the air.
- Regularly wipe the exterior of your humidifier with a damp cloth to keep it dust-free.
- And lastly, keep a record of your cleaning sessions and filter changes. It’s an easy way to make sure your humidifier receives regular maintenance, which is essential for optimal performance and longevity.
Remember, a well-cared-for humidifier not only improves the air quality in your home but also contributes to your overall health and well-being.
You Might Also Like